
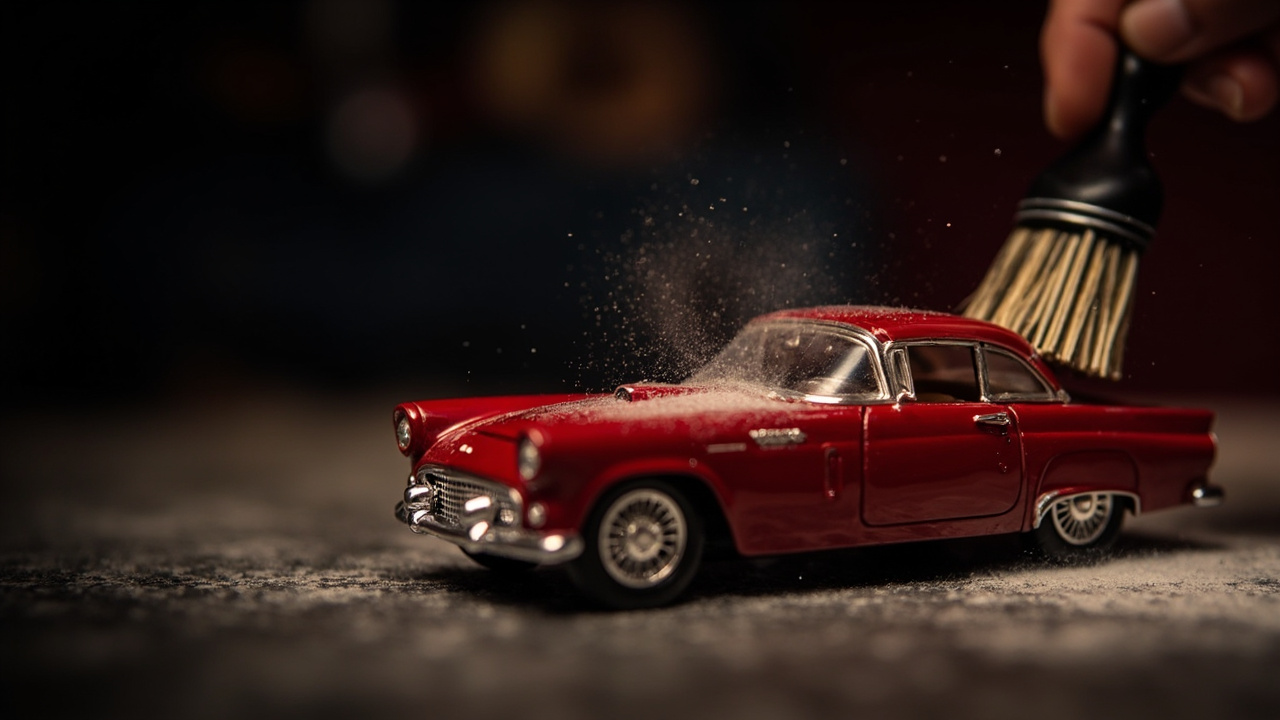
How to Clean Diecast Model Cars: Complete Guide for Collectors 2024
🔥 Global Summer Sale – Up to 80% OFF on AliExpress
Limited time deals on phones, electronics, home & more. New users get extra coupons!
Disclosure: We may earn a commission at no extra cost to you if you make a purchase through our links.
Collecting diecast model cars is a hobby that brings immense satisfaction to enthusiasts who appreciate the craftsmanship, detail, and nostalgia these miniature vehicles represent. Whether you have accumulated dozens of budget models or invested significant sums in premium 1:18 scale collectibles, maintaining their appearance preserves both their aesthetic appeal and their resale value. Yet cleaning diecast models is a task that requires knowledge, patience, and the right approach to avoid causing more harm than good.
The challenge with diecast model car cleaning lies in the delicate balance between removing accumulated dust, fingerprints, and grime while preserving the paint finish,chrome accents, window transparency, and the integrity of any markings or tampo-printed details. Unlike other collectibles that can withstand aggressive cleaning methods, diecast models are surprisingly fragile at the detailed level, and the wrong approach can permanently damage a model that took considerable effort to acquire.
This comprehensive guide walks you through everything you need to know about cleaning and maintaining your diecast model car collection. From routine dusting techniques to deep cleaning for heavily soiled models, from appropriate cleaning products to step-by-step procedures for safe and effective cleaning, this guide covers every scenario you will encounter as a diecast collector.
Understanding Your Diecast Model: Materials and Construction
Before applying any cleaning method, understanding what your diecast model is made of and how it was constructed helps you make informed decisions about which cleaning approaches are safe. Diecast models are primarily made from zamak, a zinc alloy that provides the weight and durability characteristic of quality models. This metal core is typically covered with applied paint, chrome plating, and plastic components including windows, lights, and interior details.
The painting and finishing processes vary significantly between manufacturers and between product lines within the same manufacturer. Higher-end models typically feature multiple layers of paint with clear coat protection, properly applied chrome with good adhesion, and detailed tampo printing that is resistant to light wiping. Lower-budget models may use single-layer paint without clear coat protection, thinner chrome applications that can wear more easily, and less durable print methods that can be damaged by aggressive cleaning.
Understanding where the metal body ends and plastic components begin is critical for cleaning decisions. The windows, lights, and certain interior components on most diecast models are made from polystyrene or similar plastics that can be damaged by certain solvents. The tires are typically made from rubber or vinyl, which similarly require specific cleaning approaches that differ from metal body cleaning.
Essential Tools and Supplies for Diecast Model Car Cleaning
Having the right tools and supplies before beginning any cleaning process prevents both interruptions and mistakes that can result from using inappropriate materials. The following represents the complete toolkit every diecast collector should maintain.
Soft Brushes
A selection of soft-bristled brushes serves multiple purposes in diecast cleaning. Natural-bristle brushes like soft watercolor brushes work well for dusting crevices and delicate areas. Specialized horticultural soft brushes with very fine bristles are excellent for reaching into grilles, wheel wells, and other detailed areas where compressed air might dislodge small parts. The key principle is that any brush touching your model should be softer than the paint finish itself, which means natural-bristle softness rather than synthetic stiffness.
Microfiber Cloths
High-quality microfiber cloths in various sizes form the foundation of safe diecast cleaning. The microfiber texture traps dust and debris rather than just pushing it around, and when used properly, these cloths will not scratch clear coat paint finishes. Have several on hand in different sizes, and wash them regularly without fabric softener to maintain their cleaning effectiveness. Never use paper towels, tissues, or clothing items, as these can scratch finishes.
Compressed Air
A can of compressed air or a rechargeable air blower serves the essential function of removing loose debris from hard-to-reach areas before any other cleaning takes place. Use short bursts rather than prolonged air flow to avoid creating static electricity that can attract more dust. Hold the model at an angle so that debris blows away from the model rather than deeper into crevices.
Mild Detergent Solution
A solution of lukewarm water with a tiny amount of mild dish soap provides the baseline cleaning liquid for diecast models. The detergent should be free of abrasives, strong fragrances, and harsh chemicals. Test any detergent on a small, inconspicuous area before applying to the entire model. Avoid detergents with moisturizers, as these can leave residues.
Isopropyl Alcohol
Isopropyl alcohol in concentrations of 70% or less serves as a cleaning solution for more stubborn contamination including adhesive residues, ink marks, and grease buildup. Higher concentrations evaporate too quickly to be effective for cleaning, while lower concentrations lack the cleaning power needed. Test on an inconspicuous area before applying to visible surfaces, and use sparingly.
Cotton Swabs and Toothpicks
These basic supplies serve for detail cleaning in areas too small for fingers or cloths. Cotton swabs allow precise application of cleaning solutions to small areas without spreading to surrounding surfaces. Toothpicks wrapped with a tiny amount of cotton work for reaching into extremely tight spaces like grille openings and wheel spokes without scratching surrounding surfaces.
Wheel and Tire Cleaning Tools
Soft-bristled brushes specifically designated for wheel cleaning, old soft toothbrushes for tire detail work, and wooden skewers for cleaning between wheel spokes complete the toolkit. Keep these tools separate from other brushes to avoid cross-contamination with any cleaning solutions that might transfer to painted surfaces.
Routine Dusting: The Foundation of Diecast Model Care
The most important cleaning task for diecast models is regular, gentle dusting that prevents the accumulation of debris that eventually requires more aggressive cleaning methods. How often you dust depends on your display environment, but monthly dusting is the minimum recommendation for displayed models.
The Dry Dusting Technique
Begin by using compressed air to remove loose particles from the entire model, paying particular attention to areas where dust accumulates including the hood, trunk, roof, and wheel wells. Hold the model at an angle and use multiple short bursts rather than continuous air flow. After compressed air treatment, allow any disturbed dust to settle before proceeding.
Using a clean, high-quality microfiber cloth, gently wipe flat surfaces using light pressure and smooth, consistent strokes. Avoid circular motions, as these can concentrate debris and potentially create very fine scratches over time. For textured or contoured areas, use a soft brush to gently loosen dust before wiping.
Detail Dusting in Crevices
For grilles, radiator shells, body seams, and other recessed areas, use a soft brush to gently dislodge accumulated dust before it settles and becomes compacted. Work from the outside of the area inward to avoid pushing debris deeper into the model. A horticultural soft brush or clean, soft artist brush works well for these areas.
Wheel and Tire Dusting
Wheels and tires require separate attention because they accumulate different types of debris than the body. Use a soft brush to dust wheel faces, taking care around spokes and detailed wheel designs. For tires, use a dedicated soft brush to clean the rubber surfaces, working the brush in gentle circular motions to remove dust without damaging the tire molding or lettering.
Deep Cleaning for Moderately Soiled Models
When routine dusting is insufficient, typically due to fingerprints, light grime accumulation, or dust that has been present for extended periods, a more thorough cleaning approach becomes necessary. This level of cleaning applies to models that have been handled regularly or stored in less-than-ideal conditions.
Preparation Steps
Begin by removing the model from any display area and working on a clean, soft surface that will not scratch the finish if the model is moved during cleaning. Lay down a microfiber cloth or soft padding for the model to rest on during cleaning. Ensure your hands are clean and dry, or wear clean cotton gloves to avoid adding fingerprints during the cleaning process.
Panel Cleaning Method
Dampen a clean microfiber cloth with the mild detergent solution, wringing out excess liquid so the cloth is damp but not wet. Starting from the top of the model and working downward, wipe each panel with the grain of any contoured lines to avoid pushing debris across the surface. Rinse the cloth frequently and replace with fresh solution when the cloth accumulates visible debris.
For vertical surfaces, work from top to bottom using gentle downward strokes. Do not scrub or apply excessive pressure, as the goal is to lift contamination from the surface rather than abrade it away. For heavily soiled areas, allow the damp cloth to rest on the surface for 30 seconds before wiping to allow the detergent to work.
Rinsing and Drying
After cleaning with detergent solution, use a second cloth dampened with clean water to remove any detergent residue. Work in the same pattern as the cleaning step, always rinsing the cloth and replacing with fresh water when visible residue appears. Never leave detergent solution to air dry on the model, as this will leave water spots and potentially harmful residue.
Use a clean, dry microfiber cloth for the final drying step. Pat rather than rub the surfaces, and allow the model to air dry completely before returning it to display or storage. Placing a model that is not fully dry in a display case creates conditions for moisture damage to interior components and potentially the metal body over time.
Cleaning Stubborn Contamination
Some contamination resists routine cleaning methods and requires targeted approaches using specific cleaning agents. Understanding what each type of contamination requires helps you address problems without causing damage.
Fingerprint Removal
Fingerprints are among the most common cleaning challenges for handled models, and addressing them promptly is important because the oils and acids from skin contact can potentially damage paint finishes over time. For fresh fingerprints, the mild detergent solution is usually sufficient when applied with a gentle touch.
For older, more set fingerprints that have dried onto the surface, apply a small amount of isopropyl alcohol to a cotton swab and gently dab the affected area. Allow the alcohol to work for 15 to 30 seconds before gently wiping with a clean, soft cloth. Test on an inconspicuous area first to ensure the alcohol does not affect the paint or clear coat.
Adhesive Residue
Models that have had price tags, labels, or protective tape applied often develop adhesive residue that is challenging to remove. The mild detergent solution should be tried first, allowing the solution to soak into the residue for several minutes before gentle wiping. For more stubborn adhesive residue, apply a small amount of isopropyl alcohol to a cotton swab and work gently on the residue, taking care not to spread it to surrounding areas.
Never use adhesive removal products marketed for household cleaning, as these often contain chemicals that can damage diecast paint finishes and chrome plating. Products like Goo Gone or similar solvents can strip paint, attack chrome, and degrade plastic components.
Grease and Oil Contamination
Handling models with greasy fingers or storing them near sources of airborne grease can lead to gradual accumulation of oily contamination on surfaces. This type of contamination is best addressed with the mild detergent solution, allowing adequate soaking time before wiping. For particularly stubborn grease, a solution of water with a very small amount of white vinegar can be effective, though testing on an inconspicuous area is essential before broader application.
Chrome and Metal Accent Cleaning
Chrome plating on diecast models requires specific cleaning approaches because the underlying metal is susceptible to corrosion and the chrome layer itself can be damaged by abrasive or chemical cleaning methods.
Safe Chrome Cleaning
Begin chrome cleaning with dry dusting using a clean, soft microfiber cloth. For fingerprints and light contamination, a barely damp cloth with clean water is often sufficient. If additional cleaning is needed, apply a tiny amount of isopropyl alcohol to a cotton swab and gently clean the chrome surface using light, gentle movements. Never scrub chrome or use abrasive materials on plated surfaces.
For chrome that has developed light surface oxidation or spotting, a specialized chrome polish designed for automotive chrome can be applied sparingly using a soft cloth. Work in small sections and buff to a shine before moving to the next section. Avoid getting polish on painted surfaces or plastic components.
Preventing Chrome Damage
The most important principle for chrome care is prevention through regular, gentle cleaning that removes contaminants before they can cause lasting damage. Never leave chrome surfaces wet, as water sitting in crevices and seams can lead to oxidation under the chrome layer. Store models in environments with stable, moderate humidity to avoid conditions that promote corrosion.
Window and Plastic Component Cleaning
Clear plastic windows and light components on diecast models require careful cleaning to maintain their transparency and avoid scratching or chemical damage.
Window Cleaning Technique
For dust and light contamination, use compressed air to remove loose particles, followed by gentle wiping with a clean, dry microfiber cloth using light pressure. For more thorough cleaning, dampen a cloth with clean water and wipe the windows gently. Never use paper products, tissues, or rough materials on plastic windows, as these create fine scratches that accumulate over time and cloud the transparency.
For stubborn contamination on windows, a solution of water with a tiny amount of mild dish soap can be applied with a soft cloth. Avoid getting any cleaning solution into the interior of the model through seams or gaps around the windows. After cleaning, wipe with a clean, damp cloth to remove residue, followed by a dry cloth for the final polish.
Headlight and Taillight Care
The plastic used for lenses can be damaged by certain cleaning agents, so test any cleaning solution on an inconspicuous area before applying to visible lens surfaces. Generally, clean water with a soft cloth is sufficient for regular lens cleaning. For oxidation or clouding that develops on older models with acrylic lenses, a specialized plastic polish can restore clarity, though this is more relevant for models that have developed problems over long storage.
Wheel and Tire Care for Diecast Models
The wheels and tires of diecast models often accumulate more visible contamination than other areas because they contact surfaces during display and handling. Maintaining clean wheels contributes significantly to the overall appearance of displayed models.
Wheel Cleaning Process
Begin by removing loose debris from the wheel area using compressed air and a soft brush. Pay attention to the gap between the tire and wheel face, where dust and debris commonly accumulate. Use a cotton swab or soft brush to clean around spokes and between wheel details.
For chrome or painted wheel surfaces, use a cloth dampened with clean water, applying gentle pressure to remove dust and light contamination. For heavier soiling on metal wheels, the mild detergent solution can be used, applied with a soft cloth and followed by clean water rinse and dry buffing.
Tire Cleaning and Maintenance
Diecast model tires are typically made from rubber or vinyl and accumulate dust, fingerprints, and environmental contamination. Use a dedicated soft brush for tire cleaning, working from the top of the tire downward with gentle circular motions. For stubborn contamination, a damp cloth with mild detergent can be applied to the tire surface, followed by clean water rinse and drying.
Never use tire dressing products designed for full-size vehicles on diecast model tires, as these are formulated for actual rubber and may not be appropriate for the materials used in models. A clean, dry cloth with gentle buffing is usually sufficient for regular tire maintenance.
Special Situations: Cleaning Models with Stuck Debris
Some models develop debris that is genuinely stuck rather than simply accumulated, requiring more targeted approaches to removal. These situations typically arise from models that have been stored in challenging environments or that have had materials like tape or labels applied and removed.
Removing Stuck Particles
Small particles that have become embedded in crevices or that have adhered to surfaces through moisture or age require careful removal. Use a wooden toothpick or soft brush to gently dislodge the particle, working from multiple angles to understand the particle’s position and avoid pushing it deeper into the model.
For particles that have adhered to paint surfaces, use a soft brush dampened with clean water to gently work around the particle and lift it away. Never use sharp tools, fingernails, or abrasive materials to pry at stuck particles, as this will certainly cause more damage than leaving the particle in place.
Dealing with Degraded Stickers or Decals
Models with stickers or decals that have begun to deteriorate or curl at edges require careful handling to avoid causing further damage. If the sticker is already damaged, the priority becomes cleaning around it without causing additional lifting or tearing. Never attempt to re-adhere peeling stickers using household adhesives, as these will likely cause more damage than the original problem.
Storage and Display Recommendations for Long-Term Collection Care
Preventing the need for intensive cleaning is always preferable to addressing accumulated contamination, which makes storage and display choices critical for long-term collection maintenance. The environment in which models are stored dramatically affects how quickly they accumulate contamination and how difficult ongoing maintenance becomes.
Display Case Considerations
Enclosed display cases significantly reduce the rate at which models accumulate dust and debris, which reduces cleaning frequency and preserves the models better over time. Glass-fronted cabinets with good seals provide adequate protection for most environments. For high-value collections, consider cases with UV-protective glass to prevent light damage to paint finishes over extended display periods.
Environmental Control
Temperature and humidity stability matters for diecast model preservation. Avoid displaying models in areas subject to direct sunlight, significant temperature fluctuations, or high humidity. Basements and attics are generally poor choices for valuable collections due to humidity and temperature challenges. Climate-controlled display areas provide the best conditions for long-term preservation.
Handling Protocols
Establish habits that minimize the transfer of oils and contaminants from hands to model surfaces. Clean hands before handling any model, and consider using cotton gloves for particularly valuable pieces. Handle models as little as possible once they are in their display positions, and avoid touching painted surfaces and chrome areas during moves or adjustments.
Building a Collection Maintenance Schedule
Establishing a regular maintenance routine prevents the accumulation of contamination that requires more intensive cleaning and preserves your collection in better condition over time. The following schedule provides a starting point that can be adjusted based on your specific display environment and collection size.
Monthly Tasks
Quick dust with soft brush and microfiber cloth. Inspect for any new damage or problem areas. Check display case seals and environmental conditions. Spot clean any visible fingerprints or fresh contamination.
Quarterly Tasks
More thorough dusting including hard-to-reach areas. Wheel and tire cleaning. Chrome inspection and cleaning as needed. Window and lens cleaning. Review storage and display conditions for any needed adjustments.
Annual Tasks
Complete model-by-model inspection. Deep cleaning for models requiring it. Chrome polish treatment for models showing light oxidation. Full display case cleaning. Collection documentation update including any condition changes.
Conclusion: Protecting Your Investment
Diecast model car cleaning is not a task to be feared or avoided—it is a fundamental part of being a responsible collector who wants to preserve both the aesthetic appeal and the value of your models. With the right tools, the right knowledge, and the right approach, maintaining your collection is a straightforward process that takes minimal time compared to the satisfaction of displaying beautifully maintained models.
The key principles to remember are gentleness above all else, prevention through regular maintenance, appropriate tools for specific tasks, and patience when dealing with stubborn contamination. Never use abrasive materials, harsh chemicals, or aggressive techniques on any diecast model. When in doubt about a cleaning approach, test on an inconspicuous area or simply clean around the problematic spot rather than risking damage.
Browse premium diecast models and collector supplies for all your hobby needs.
Explore more diecast collector resources and products
Ready to Shop Smart?
AliExpress offers factory-direct prices you won’t find anywhere else. New users get exclusive welcome discounts!
Disclosure: This site contains affiliate links. We earn a commission at no extra cost to you.
Leave a Reply